People say that obtaining an instrument rating is the most difficult aviation thing to do for layman pilots like me… If that doesn’t sound like a challenge! So when having settled again in Belgium after learning to fly in Malaysia and converting my ICAO PPL license to a JAR-PPL, I set out to find a way to get trained for this instrument rating (IR).
An IR allows you to file an instrument flight plan and fly to your destination purely by means of reference to your aircraft instruments. In other words: without looking outside. This allows you to fly into clouds or low visibility, as you don’t need the visibility anymore. Instrument flying is highly procedural: follow the procedure to get you from point A to B. Procedures come in the form of approaches, formalized communication with air traffic control (ATC), planning for an alternate. In the air, you find yourself multitasking constantly and dividing your focus between looking at your instruments, reading your charts, talking (as professional as possible) to ATC … It’s a truly intense activity, but it’s very rewarding to arrive at the destination airport after having flown through clouds! A complication is that obtaining an IR in Europe is so bloody hard and expensive that almost nobody does it … so I needed to find other means to fulfill this dream.
To prepare the subject, I read the following books that cover it nicely:
- “The Art of Instrument Flying”, J.R. Williams: a bit outdated, but a personal, yet informative book
- “The Instrument Flight Training Manual as developed by Professional Instrument Courses”, Peter Dogan: very comprehensive, down to earth but complete: an absolute must !
- “Meteorology for Pilots”, Mike Wickson
I also would like to refer to the www.pplir.org website, loaded with good practical information on flying on instruments with a PPL in Europe.
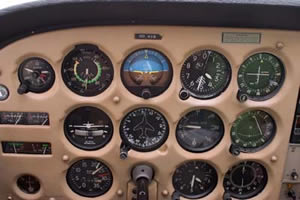
Choose between local or American Instrument Rating
So what do non-professional European pilots do if they want to learn to fly by reference of flight instruments? They go west! Despite all the JAA-aficionados, there is simply no cheaper, faster or safer alternative in the JAA regulation. I checked on price and regulation to get a JAA IR added on my JAA Private Pilot License.
First of all, I needed to upgrade my medical to a class 1: basically the same as an airline captain flying 500 passengers with a 747. Why should I do that? Of course, it costs money as well.
Also, you are supposed to sit in a classroom for 100 hrs of theory courses (and pay for the teacher). I have never liked sitting in classrooms. In fact, I obtained my university engineering degree by skipping all courses the last three years: no way you will ever see me in a classroom again. I learn by reading multiple books by multiple authors, looking at the subject from multiple angles, and asking questions to pros when I really don’t understand an issue.
Then, you are supposed to get 50 hrs of instrument time on a complex airplane, at a dedicated airport that charges for every approach made. Think about 25 EUR per approach at Ostend (EBOS). You need to be accompanied all the time by a highly paid instructor employed by a recognized Flight Training Organization (FTO), which has plenty of overheads to cost in. Again: why do this for a hobby?
When I added it all up, a European JAA-IR costs more than 15’000 EUR. Can you believe this?
Once you earned your expensive JAA-IR, you need to keep it current or you loose it. Yes you read this well: you can loose the thing, meaning you have to redo it if you decide to stop flying for like 5 years. Why, why, why ??? JAA doesn’t want private pilots to hold instrument ratings. That’s my conclusion.
So, the other alternative is more wallet-friendly and as safe: obtaining the American FAA instrument rating, while training for it in Europe, and restricting yourself to instrument flying on N-registered airplanes:
- You can study the theory on your own and your own pace. The exam can be done in Paris or Farnborough, for instance.
- A class 3 medical is good enough.
- You need 40 hrs of (simulated) instrument time.
- You can do up to 20 hrs in a flight training device. I used an inexpensive FS-200 Jeppesen flight training device at the Kortrijk Flying Club in Belgium.
- You can pick your instrument instructor and she/he need not to be connected to a school. He/she does not even need an American Certified Flight Instrument Instructor (CFII) rating (except for the last three hours of training).
- You train in the same environment and weather as you will fly after obtaining the rating: Europe.
- You can do you instrument approaches wherever you want. I liked France: lower cost and well organized, but I added Belgium and the UK for larger exposure.
- Your instrument rating remains with you forever, but you must keep it current and stay healthy. If you loose currency, you can regain it with your local CFII.
- The training is pretty standardized: there are books available from various vendors, no surprises with difficult or easy exams, plenty of schools, instructors, examiners, … who all work in the same way. It just feels very professional!
Disadvantages? Yes:
- You need to have a FAA validation of your PPL (don’t forget this).
- You need to pass TSA security clearance (9/11 … remember).
- You need to physically go to the USA for your flight test. However, I recently learned that there are FAA Designated Pilot Examiners (DPEs) also active in the UK.
- You will remain restricted to flying on instruments in N-reg airplanes. However, there are a number of them available for rent throughout Europe, or buying them is also possible as a non-American citizen through a trust.
- The currency requirements for instrument flying are though: keep doing it, otherwise you simply risk your life.
- There is the minor risk that EASA (or other rule making bodies) will act against N-regs based in Europe.
So my decision was easily taken: follow the FAA way. And by the way: many, many European pilots wanting to fly in bad weather are taking this route! I budgeted my Instrument Rating to north of 5’000 EUR, and I have spread it over two years of training because of time and money constraints.
Find an instructor
For training on your instrument rating, you must find and hire a CFII: a Certified Flight Instrument Instructor. This can be a European of course, but he/she must have a current instructor rating issued from the American FAA. As per FAA rules, any instrument instructor is fine to provide you instrument training (except the last three hours of training), but it’s probably not advisable as there are plenty FAA CFIIs available in Europe. Ask around on your local airfield, and you fill find suitable candidates. I know of two guys in Kortrijk (EBKT) for instance. I choose Mr. Hans Van Den Bossche from Waregem, Belgium. He flies for an airline so he’s not only very proficient and experienced, his training style matched very well with my expectations. I can advise him to anyone wanting to be trained in a well organized and professional environment. Performance, procedures, safety and common sense are his things.
Another way of finding a local CFII is through www.iaopa.org. There is a highly invisible Belgian chapter of AOPA (they claim 400 members though … where are they ???). After a couple of email triggers, they responded with one or two possible CFIIs.
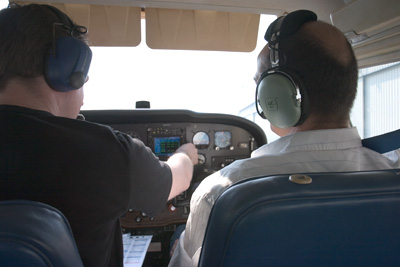
Get yourself TSA approved
Remember 9/11? Yes, the security clearance regulations came down hard on foreign pilots wanting to train in the US. Even worse: if you want to train under the FAA rules outside of the States, you should get TSA (Transportation Security Administration) approval. They call the process the Alien Flight Student Program (AFSP). Although this regulation is probably ineffective against future forms of terrorism, the US did an effort to organize it well and efficiently. I am not kidding: it’s a rather painless process.
You first check if your CFII is on record with TSA. If he’s not, he probably didn’t provide private or instrument training the last couple of years. Then you should get yourself registered with www.flightschoolcandidates.gov. You must provide ALL (yes all) data concerning yourself and the type of training you want to follow. What will follow is a series of automated email conversations that you strictly need to adhere to. You need to pay something like $130 (this works via credit card). And then you need to get your fingerprints (all ten of them!) in one or another way back with the TSA. I did that in a police station in North-Carolina: I tell you that you almost feel like a criminal when being fingerprinted…
Somewhere in the process your training provider (your CFII) will need to confirm that he knows about you, and once this loop is closed, you can begin training when you receive another automated email.
Again: it’s a painless process, but count on a couple of weeks or months to obtain the approval to start training.
Start training
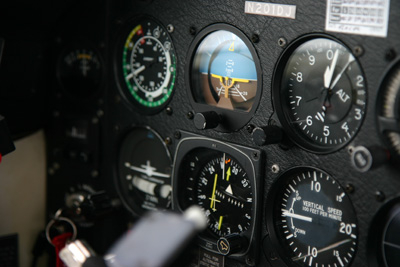
Some people asked me whether they should first do the theory (‘written test’) and afterwards the practical training, or if they can mix theory and practice. It’s basically the same, but it makes sense to have a good understanding of the theory before you climb in the airplane to start your expensive training. I practiced a lot on Microsoft Flight Simulator (MSFS): it’s still the least expensive, yet effective training to get acquainted with instrument flying. I flew flights virtually featured in the above books, just to get a feel of what instrument flying is.
As soon as you have your TSA clearance and a good agreement on the course, price, set-up and expectations of your CFII, you can start the training.
I combined real-flying training with FAA approved flight training device training with my CFII: a Jeppesen FS-200 running on an old PC. Watch out: MSFS is not approved. He thoroughly briefed me before and after every (virtual) flight. I followed his “Enhanced Instrument Training Manual” closely (can be bought from his site www.jetperformance.be, I believe).
The nice thing about this American training, is that you can do it on Belgian (or foreign) airplanes in Europe, as long as your instructor is an American approved CFII. We mainly trained in the North of France (Lille (LFQQ), Valenciennes (LFAV), Merville (LFQT), Le Touquet (LFAT)). We did lots of approaches into Kortrijk (EBKT). I did Ostend (EBOS) twice, but they charged an arm and a leg, so I would advise everyone to stay away from this GA-hating airport.
Note that I did almost all off my training in my Belgium registered club rental aircraft (C172M OO-WVS from the Zoute Aviation Club www.zac.be), so you do not need to train on an N-reg airplane. I used the Jeppesen approach plates and enroute charts. They are expensive, so you can either buy a trip kit, get a deal with someone who has a subscription, use the lousy government published charts (for free on the internet), or go illegal and use outdated second hand charts.
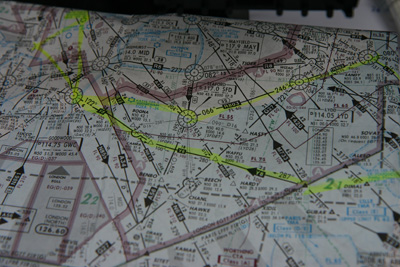
All the flight experiences need to be properly documented in your logbook (including the type & location of instrument approaches practiced). I also kept a separate training record with all this, which I got signed by my CFII after the training. This was greatly appreciated by my Designated Pilot Examiner (DPE) on the day of my practical checkride in the US, although she didn’t know where Kortrijk might be.
Next to using an approved flight training device, you can save money by training in real aircraft under the hood with your friend as a safety pilot. This friend, of course, must have a PPL for the aircraft used and be current, and he needs to sign along on your logbook.
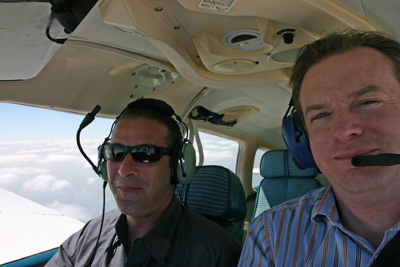
It’s big fun, you learn flying far more precisely and you evolve to a higher degree of safety. As required by the FAA, you also need to do a long IFR navigation trip. Mine was pretty interesting.
By training in Europe, studying the American and European regulations, and by doing my checkride in the USA, I am convinced that I am now reasonably proficient in both systems, a distinct advantage.
Written test
Somewhere during (or before) your practical training, and certainly 24 months before your practical test (checkride), you need to pass the 60 question multiple choice written test. Although some claim that it is easy, I can tell you that it is not! Admittingly, all the questions are known and published beforehand. But there are more than thousand of them, so you need to have a good understanding of instrument flight if you want to succeed. Inversely, when thoroughly studying for this test, you learn a lot of details that can save your life one day up in the clouds.
I studied the following books:
- The well known FAA-H-8083-15 “Instrument Flying Handbook” from the FAA
- Relevant portions of the latest FAR/AIM
- “Instrument Rating Test Prep” from ASA: the ubiquitous publications with all test bank questions and their answers. Gleim also publishes a similar book.
- I’d also advise the FAA book AC 00-45E on “Aviation Weather Services” as the weather stuff in the written and oral requires some knowledge on obtaining weather info in the US.
I believe you can buy all these books in Europe, and they should be available from other online or live pilot shops in Europe as well (General Aviation in Paris, Luchtvaart Hobby Shop in Amsterdam, Transair Pilot Shop in the UK, …). I did most of the studying by myself, but you can of course ask your CFII in case of questions. That freedom is a great advantage of the American instrument rating training. At the end of your preparation, you need a written endorsement from your CFII before you can take the test.

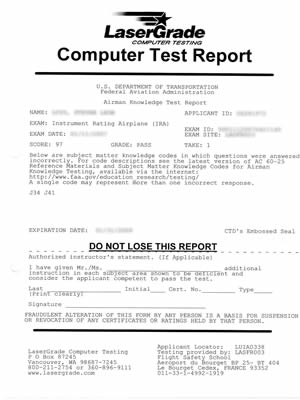
While you are studying, don’t forget to book your written test slot in time. I choose the computerized test at Le Bourget airport north of Paris with Flight Safety International (they can do it in Farnborough, UK too). The friendly lady there will give ample advice, but count on a hefty fee of 155 EUR. They have most information readily available. Just call Mrs. Maud Duboscq on +33 1 49 92 19 19. If you are ready and your CFII signs you off, drive or fly (VFR 🙂 ) to Paris and do the test. If you are well prepared, don’t settle for a score of less then 90%. If you’re not, prepare to pay another 155 EUR…
Guess what: I passed with 58 out 60 questions answered correctly !
My Instrument Checkride Story
After:
- 50 hours of cross country flight as PIC
- 40 hours of simulated or actual instrument time
- 15 hours of instrument flight training
- 3 hours of instrument training maximal 60 days before your flight test, and an endorsement of such training from you CFII
- the 250 NM long IFR navigation trip
- having passed your written test
- spent more then 5’000 EUR
- your instructor feels OK about it, and endorses that you are ready…
… you are ready for your checkride.
Next to the practical training & the written test, you should have studied for the oral portion of your checkride. There are many excellent training and studying resources available. Especially for the oral, I also studied the profound ASA “Instrument Oral Exam Guide” by Michael D. Hayes. I also reviewed the latest FAR/AIM (which you can use during your oral exam as a backup), and some private pilot VFR topics as a refresher.
Your CFII is supposed to give you extra ground school for those subjects that you missed out on your written test, and endorse that you have received this specific training.
He also needs to provide three hours of instrument training within 60 days before the checkride, and separately provide you with an endorsement for this last minute training. Finally, your CFII and yourself should fill out the 8710-1 application for your checkride. This requires a lot of experience, and it turned out to be my most difficult task! There are two ways to get this done. First through the internet via IACRA (use Google for the appropriate URL). This didn’t work for me as there was a known bug in the system for foreign pilots with a restricted license like me. So we reverted to the second option: the 8710-1 form filled out in ink. You do need the most up-to-date form as it changes every now and then (check under www.faa.gov). And then you must fill it out readably and using the formats exactly as mandated on the form. So use 10-1-2007 to indicate October 1st 2007, and not 1/10/2007 or Oct 1 2007 … Your CFII needs to sign the back of the form, so print out the form on both sides of the paper. You get the picture: filling out the 8710-1 by hand is a hard to obtain skill only acquired by trial and error. Finally, if you want to add your instrument rating onto your restricted FAA private pilot license issued on the basis of a foreign license, you still need an American 3rd class medical certificate. Luckily there are lots of Approved Medical Examiners around in Europe who can provide you with this certificate after a simple common sense medical test, and a fee of course. If you are under 40, it remains valid for three years, beyond 40, it expires after 2 years.
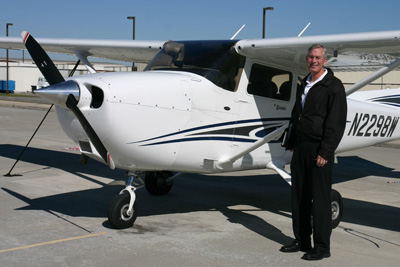
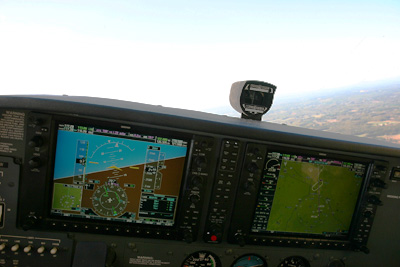
So I choose to take my checkride in the USA. I read about DPEs operating on a full time or part time basis in Europe too, but I believe that they are more expensive and less flexible. With the current exchange rate of Euro versus Dollar, and the possibility to combine the checkride with a business trip to the US, my choice was easily made. I also decided to turn the checkride into an opportunity to learn some extra things, so I set out to train on a Garmin G1000 equipped glass panel technically advanced aircraft (TAA) Cessna 172S airplane.
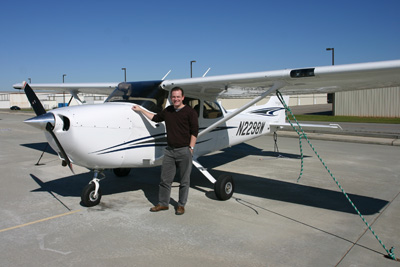
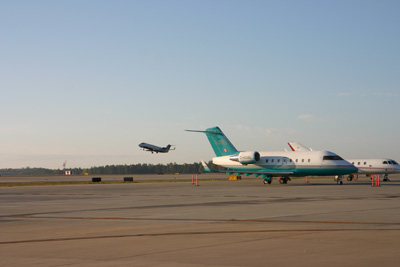
I had flown before with Flightgest Inc. in Raleigh-Durham, North Carolina (www.flightgest.com). They operate three of those glorious G1000 Cessnas. I had experienced their high degree of professionalism and well equipped airplanes before. On top they are based on a busy class C airport with reasonably weather conditions, giving flying an extra challenge (and I experienced that …). Yep, this meant flying in between the Boeings, Airbusses and Embraers.
I can advise anyone to train and fly with Flightgest: they are great bunch of guys. And they have the wonderful G1000 Cessnas. The hourly rental rate is $135 and a CFII comes at $48. This beats any European rental fee! Let apart the state and age of airplanes you get to fly in Europe. I also bought from them all the up-to-date approach charts and maps for the area, as well as a brand-new FAR/AIM 2008, which you need for study and for the oral exam. I trained with the local CFII Mr. Ken Menzie at Flightgest, and he’s probably one of the best instructors I ever had! He used to fly C130s for the airforce and now instructs at Flightgest, in combination to flying charter flights in their Cessna 208 Caravan. He really treats you as a father. He not pressed in any way to change jobs to the airlines, so he dedicates more time to your training on the ground and in the air than expected or charged. He is also the guy who manages the TSA program to handle international pilots, of which they get quite a few as the Raleigh area features a high tech campus with a lot of foreign engineers working there. Ken has a good contact with TSA, so he is of great help for foreign pilots wanting to train in the US.
Important note: after checking with the TSA, I did not have to obtain another training approval to train in the G1000 at Flightgest as this was considered to be review training only. We only needed to limit the training to maximum 10 hours. This has an important bearing on your immigration visa requirement too. The only requirement is that my European CFII needed to have signed me off for my checkride on the 8710-1 form before I entered the USA.
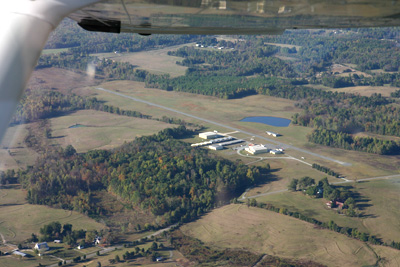
In Belgium I bought and studied the ASA DVD on operating the G1000 system (“The Complete G1000 Course”). I didn’t like this course too much. Once in Raleigh, I could also watch the King DVDs on the G1000 at Flightgest, and I believe they are much better to explain the system, but they are also more expensive. The G1000 course given by Ken Menzie was done in three days, albeit that it felt very condensed, but that was my own choice. All the while, I trained the local instrument approaches, ATC speak and system in the area in preparation of my checkride. So the whole US training & checkride was finished in four days. Very busy, stressful and expensive four days, but very much worth it after all. The first morning, we did ground training in the aircraft with an external power plug to learn the G1000 in the easy but realistic environment of an aircraft on the ground. Then Ken took me into the sky to do some basic VFR air work. It was a very bumpy day, so the flying was not easy. I had a hard time keeping my altitude and getting the steep turns going well. The second day we booked the plane for the whole day. We did plenty of instrument approaches in Greensboro (KGSO), Burlington (KBUY), Franklin County (KLHZ), Johnston County (KJNX) and Raleigh (KRDU). In the US, there not only very many small airfields, they also boast a myriad of precision and non-precision approaches, weather observation systems and well maintained runways and aprons. This is pure flying-luxury!
The second day, which featured great flying weather, was intense, went well and was after all great fun. I still needed to work on controlling my airspeed in the descent, but Ken helped me greatly. We practiced missed approaches, partial panel and more unusual attitudes. At the end, he signed me off, and I was ready to solo this C172 G1000. Ken also conducted a mock oral exam to verbally prepare me. That was of great help as there is a difference between reading things in books, versus speaking out aloud. Also, I was taught some subtleties in the regulations.
All the while, I studied like crazy during the mornings & evenings. I stayed in the economic Microtel Hotel in Morrisville, under the approach path for runway 5L of Raleigh’s airport. I paid about $75 per night. I picked up a rental car from Hertz, paid with my frequent flyer points from Lufthansa, so that was a good deal.
The third day, I flew N2298W VFR solo to practice approaches at Burlington (KBUY) and Liberty / Causey (2A5) as this would be the probable area of my checkride. I was pretty satisfied with the performance and considered myself OK for the next day’s checkride. I screwed up, however, the taxi instructions when I taxied out for a 5L departure in Raleigh. I turned right, while it should have been left and I did change frequency prematurely, causing the ground controller to call me a couple of times without me receiving him … quite embarrassing. Ken was, as a good father, listening in on the ground frequency from his office, probably biting his nails on his decision to let me go solo…
The fourth day was checkride day. Ken had arranged a local DPE for me. I had communicated with her via email beforehand to check if all my paperwork was OK (remember the 8710-1 form saga…). She was of great help to assist, although it was the first time for her to do a checkride for a pilot with a foreign license. It was both a steep learning curve for me as for her. When we met in Burlington, we both felt like we knew each-other already.
A couple of days before the checkride, she had me prepare an IFR flight from Burlington (KBUY) to Cincinnatti (KCVG). I dutifully had calculated a flight log, studied the weather, the NOTAMS, the maps and approach charts.
So at checkride day, I flew again solo Burlington airfield (KBUY) at around 9 am. Weather was beautiful despite the passage of a weak cold front a couple of hours earlier. I was nervous, but concentrated. I met the DPE at 9.45am and we started right away. First she checked my foreign license, my American restricted license, the 8710-1 thing, my medical, my logbook and related endorsements (that’s when my training curriculum came in handy), my written test result, the verification letter issued by the FAA that states that my foreign license is valid (you definitely need this, and it must be obtained a couple of months beforehand as the FAA checks with the foreign authorities if your license is in fact valid). She asked me to check the new private pilot license with the added instrument rating that would become valid when I passed this checkride … it was very teasing & tempting … She collected the $350 checkride fee.
This DPE was happy that all was properly prepared. She explained me that there were three possible outcomes of this checkride: 1. I pass and I obtain the rating right away; 2. I pass the oral, but airplane or weather does not allow me to do the practical test; 3. I fail on a portion of the practical test and then I can fly her back, and do the rest after extra training within 60 days; or I do the rest of the test and then I have to redo the failed portion within 60 days.
Then the oral exam started. She checked my prepared log and flight plan to Cincinnatti and she had no comments or questions besides that fact that I filed for 10’000 feet due to terrain, which she found high. Then she asked me to show her the low en-route IFR chart of Cincinnatti, and she was surprised that its format had changed. She started pointing out features that I had to explain: brown/blue/green airports, MEA, MOA, MOCA, MCA, MRA, ATIS, Class C, DME distances, restricted areas, runway lengths, elevations, ARTCC frequencies, HIWAS, RCO, FSS, … She asked why a certain MRA on a fix could be higher than the MEA for the airway. Then I had to bring up the approach plate for the ILS rwy 6 into Burlington to explain missed approach, MSA (why is this interesting info?), TCH, GS, negative print L, why do you need ADF, MIRL, REIL, out-of-scale lines, triangle-T, triangle-A, what is triangle-A NA, what are the part 91 minimums? So why are there alternate take-off minimums established (obstacle clearance!), what are the non part 91 take-off minima for single engine airplanes, what is the maltese cross symbol, what is the FAF for the ILS approach, what is the DH? Then she leafed to the VOR 2 approach at Liberty / Causey (2A5) and asked how to determine the missed approach point (time!). Then she leafed to another airport where I had to explain the ‘flat-eight’ symbol on a taxi diagram (displaced threshold) and tell how much landing runway was left. Then she leafed to an approach plate at Sanford-Lee County (KTTA) and she asked to explain GCO and how to operate it (it’s in the AF/D). She commented that she just learned that you have to click every minute to keep the telephone line of the GCO open. This all went very well.
Then she produced some of her own radar weather maps and asked me to explain ‘NE’… I didn’t know that. I told her that I gambled on ‘northeasterly winds’, but that didn’t sound convincing. I had to explain the precipitation areas … and she asked me how they were officially called … I didn’t know, so she said it started with an ‘E’ … Echos ! So now I could explain ‘NE’: No Echoes … there we go … So she was helpful with hints when you don’t know something. I had to explain R, RW, -RW, TRW, echo tops, cell movement. Then she produced some METARs and TAFs. I had to read one aloud and then she asked to explain SPECI, NSW, SKC, FM, BR, -RASH. What is an airmet, a sigmet, a convective sigmet (know to which class the moderate ice & turbulence belongs)? Three stages of a thunderstorm? Where do squall lines form? Difference between advection and radiation fog?
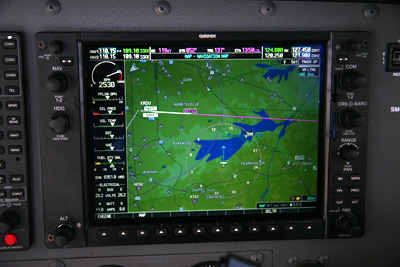
Then we started the more regulatory part of the oral. This DPE actually has a list of questions to ask from which she picks interesting ones: fuel requirements, alternate requirements (don’t forget the requirement of a published approach), loss of two way radio comms, IFR currency (+ what does a safety pilot require (also a medical as I guessed correctly)), medical currency, what tests are required during a Instrument Proficiency Check (thanks Ken for briefing me on that one), can you deviate from an ATC clearance (no, only in emergency, or a TCAS message: she had me looking this up in the FARs!), do you need a VSI for legal flight? What is an AD? Who issues them (I had them looking up in the maintenance log, and saw they come from the FAA as opposed to a service bulletin). Aircraft maintenance requirements (annual: I had to show the actual log, 100hrs only for hire or instruction (not for pure rental as I wrongly explained!)), pitot-static, altimeter, transponder, ELT, VOR checks (she did not ask me how to perform such check…). She asked me what drives the airspeed indicator. I need to explain how the turn indicator worked. With the G1000, it’s the AHRS that drives it. Surprisingly, she wanted me to explain how the G1000 system was composed: I started with the two displays, the GIAs, she asked what the GIA meant, then she stopped me when she realized that I knew my stuff.
That was it, after 25 minutes we were done. She said it was the fastest oral she had ever done and congratulated me on the preparation … so far so good …
The next step was the briefing of the practical test. We would fly to Liberty VOR, do the VOR rwy 2 approach at Liberty / Causey (2A5) as expected, followed by a partial panel on GPS rwy 6 at Burlington (KBU) and top it off with a hand-flown ILS rwy 6 approach also at Burlington. All this I had prepared beforehand, luckily.
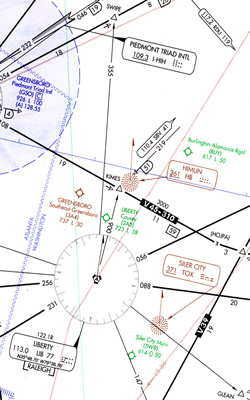
We actually followed the whole briefing during the actual test, so that was a good heads-up for me. She told me about positive change of controls, she asked me to announce the MDA / DH whereupon she would call us visual. I would do the radio and she would provide extra ATC when needed. I just should not push the PTT button upon read-back! She was also responsible for see-and-avoid. She told me that she would not trick, nor distract me as she found her mere presence already enough distracting…
She told me to do the preflight, and when that was done, she joined me in the aircraft. No, she did not need a passenger briefing. I primed the engine, which was stupid, because I couldn’t get the airplane started as it was still hot from the inbound flight. I tried three more times and then I reverted to the ‘flooded start’ checklist, which got the engine running in no time. Pretty embarrassing as a start. I carefully worked the checklist, obtained the AWOS and provided the departure briefing. She told me to do the run-up on the compass rose at Burlington, I set up the instruments for the first approach: VOR rwy 2 at Liberty / Causey airport.
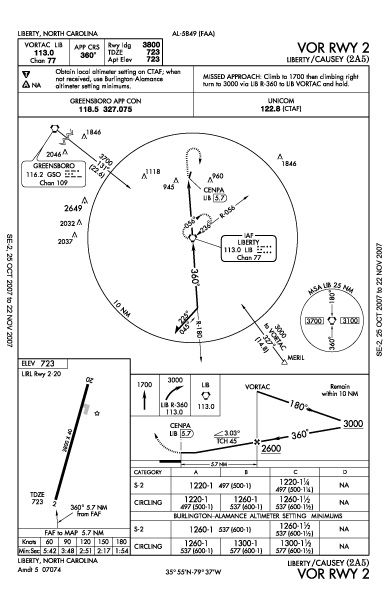
We took off, I donned the foggles and we climbed towards 3000 ft, direct Liberty VOR. During the climb she helped me getting the altimeter setting from that airport as required to fly the lowest minimums for the approach. The lady at the radio provided the altimeter setting to my DPE (who apparently was from this area), but she didn’t understand me … Once level at 3000 ft, she took controls and asked me to look down to my feet. We did a pretty aggressive ‘Hans style’ unusual attitude up, and one down. The red chevrons of the G1000 appeared … All this in full panel mode. Then I switched to the VOR for primary navigation, and not the GPS, which turned out to be a big mistake. I also switched on the autopilot. The air starting to get bumpy as the earth was heating up, and hot air started to rise. Near the Liberty VOR, I spotted an airplane on the TIS (Traffic Information System) G1000 MFD screen, 500 ft below. I looked under my foggles on my left hand side, and just saw it passing underneath … pheww, pretty close and she never spotted it! In hindsight I believe this distracted me causing the following mistake (for lack of a better excuse).

Over Liberty VOR I tracked what I thought to be the outbound course, but I had forgotten to set the correct outbound course for the approach … I was tracking my old inbound course … She had to point it out to me, and that was the big mistake of the day. Anyway, I was on the safe side of the approach and I corrected quickly. I used the heading bug to navigate around the procedure turn and started the timer in time at the FAF (Liberty VOR again) and started descending. She asked me to call out at the MDA and one minute before the time expired. When visual, she told me to go missed approach and we did the full missed approach with the published hold back to Liberty VOR. Winds were pretty strong, and the autopilot did not command a rate one turn in the hold, so we drifted somewhat towards the wrong side of the hold. I remarked it, but she didn’t care too much.
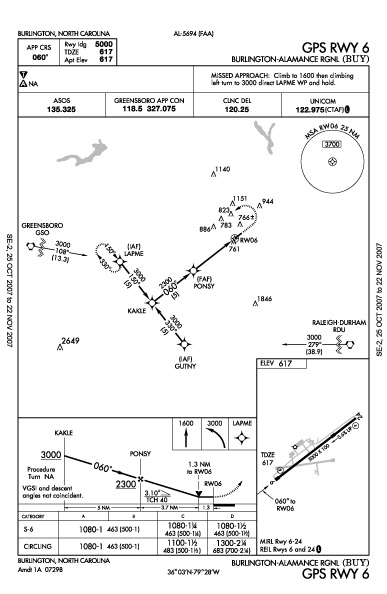
On the outbound of the holding, she told me to go direct GUTNY for the GPS rwy 6 approach at Burlington. I programmed the approach in the G1000 (she reprimanded me afterwards for not having used the NRST button to do a quick programming), and I briefed the approach. By that time we were already 0.5 NM from GUTNY, so she told me to do a 360° turn to regain my concentration. She dimmed the PFD and I reverted the MFD to make it become a PFD and used the autopilot to do the approach. Once on the final course, I descended using the autopilot, but I must have disarmed the altitude capture mode as at 2300 ft, it kept descending so I had to manually intervene and I switched off the autopilot. I handflew the rest of the approach, we missed an encounter with a big bird according to her, became visual and did the circle-to-land to runway 24 at Burlington. She restored my PFD to full panel.
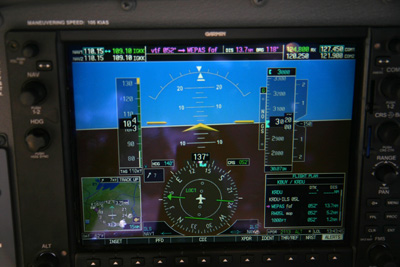
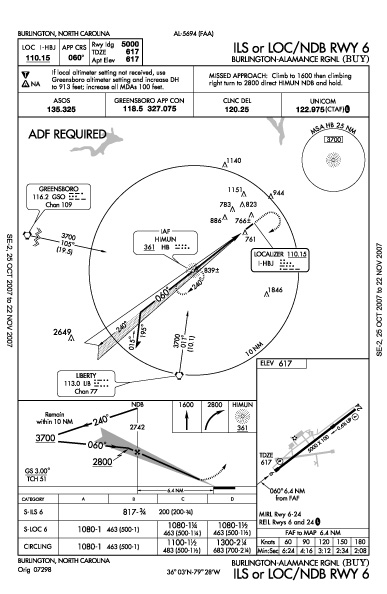
On final, she told me to do a low approach and from then onwards she vectored me for the ILS rwy 6 approach at Burlington again. The ILS had to be flown manually. No problem as I distrusted my autopilot flying skills anyhow by that time. I set up and briefed the approach. I missed one vector as I was concentrating too much on keeping my altitude, but she didn’t mind. Once on the final approach course, she started chatting about buying Microsoft Flight Simulator (MSFS) for her husband, and how much it cost and how well it simulates the G1000 … that taught me that she was relaxed and that she didn’t keep her promise on not distracting me … I flew a beautiful ILS into Burlington while chatting about MSFS, landed with a cross-tailwind that blew me to the left. She told me to keep on the centerline. We taxied to the ramp and only when I shut down the engine, she gave me a hand and told me I passed ! Pfff …
We went inside, she did the rest of the paperwork and handed me my brand new license, and took my old license with her!
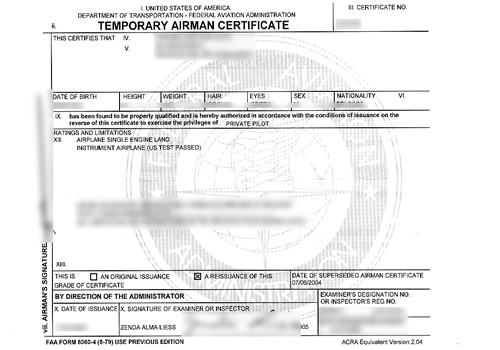
She debriefed me and told me that apart from the error at Liberty VOR, I did very well. One hour and ten minutes checkride flying on the hobbs. She asked me some extra questions on Flight Simulator, and we said goodbye! That was it …
Of course, upon return to Raleigh from Burlington, I couldn’t resist to file an IFR flight plan based on the privileges of my brand-new license. So I flew in gorgeous VFR weather back to Raleigh where they gave me a visual approach. Taxi back and that was it! Mission completed.
Thanks
I wanted to thank Hans and Ken for the teaching, the ZAC, Jan and Flightgest for the airplanes, my DPE for the challenge of doing this with a foreigner, www.pplir.org for the supplemental information, Michael & Wim as safety pilots, family & friends for the support and my wife Tilde for the patience, the financial ‘just go and do it’ and for being able to live with a totally obsessed amateur aviator.


Hi Steven, I would like to personally extend my gratitude for sharing with us your passion, the process and detailed explanation to obtain an IR rating.
As I’m in the prep phase to commence training, your post, motivation and experience will help to exceed this goal!
Thank you.
Gregory
Thank you Greg.
Good luck with your rating! It is fully worth the effort.
Steven